The project for this week has been migrating an existing application to Lambda on AWS using .NET Core as the programming language. The program executes on a scheduled frequency, about every 15 minutes.
Lambda’s are commonly invoked from other applications and there are almost endless possible scenarios. We will execute a lambda via CloudWatch Events on a scheduled basis. You can use CloudWatch Events to run a lambda every 15 minutes and/or run on the 3rd Monday of the month etc. Think of this as CRON for AWS.
First, you need your lambda (I am using .NET Core but you can use anything)
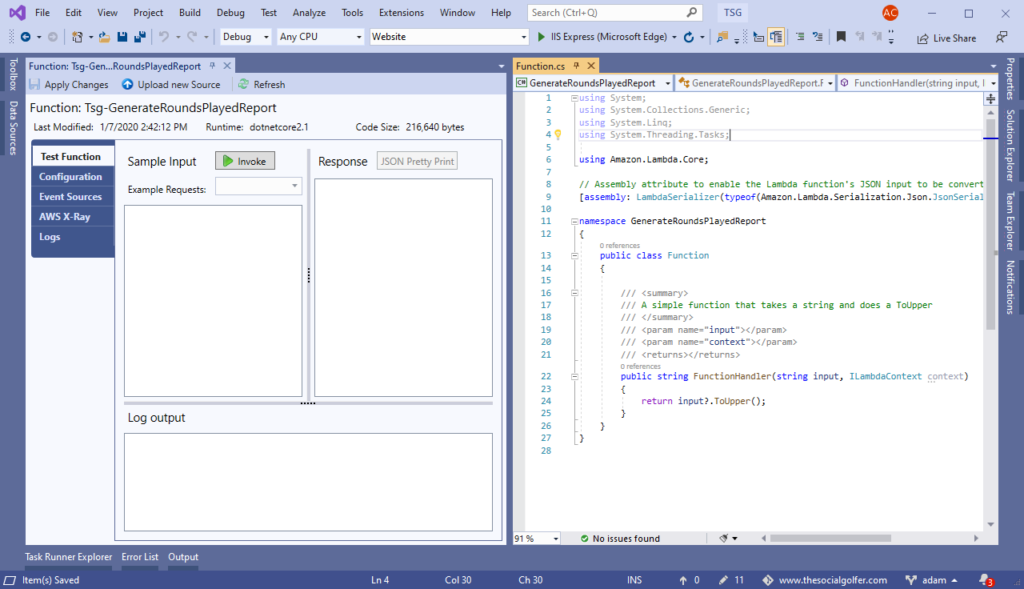
Before you begin you’re going to need a lambda to execute and I have mine called 'Tsg-GenerateRoundsPlayedReport' and I set this up using the AWS SDK plugin for Visual Studio. This bit isn’t important as the schedule is not specific to programming language.
This is how Visual Studio looks with my lambda project created; This is a published lambda, I can invoke it directly in the AWS extension. This lambda is going to be used for the folks at The Social Golfer to generate a report from a SQL database.

Our lambda is using .NET CORE; you can use any programming language Lambda supports. There is no platform specific dependencies here.
Side note: You can create the schedules using the ‘Event Sources’ section of the Lambda explorer but I find it smoother on the web.
Create the actual schedule now.
Now we can make the schedule. Open the AWS console and login, don’t forget your OTP (and if you don’t have it setup, I suggest you do).
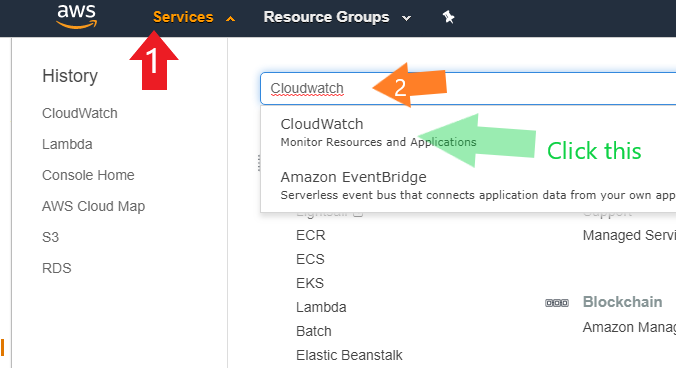
Once you have signed in click ‘Services’ at the top and type in CloudWatch, look at the screenshot below and you should see what it should look like. If you’ve been there before, look under history and click ‘CloudWatch’

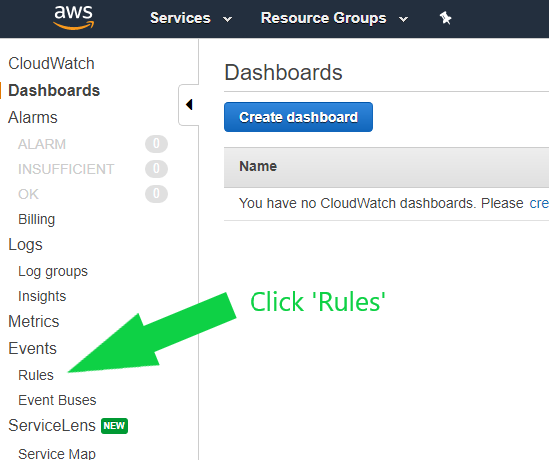
Now were cooking, once you’ve clicked ‘CloudWatch’ (highlighted in green in the above image). Your screen should look like the below image, go ahead and click on ‘Rules’

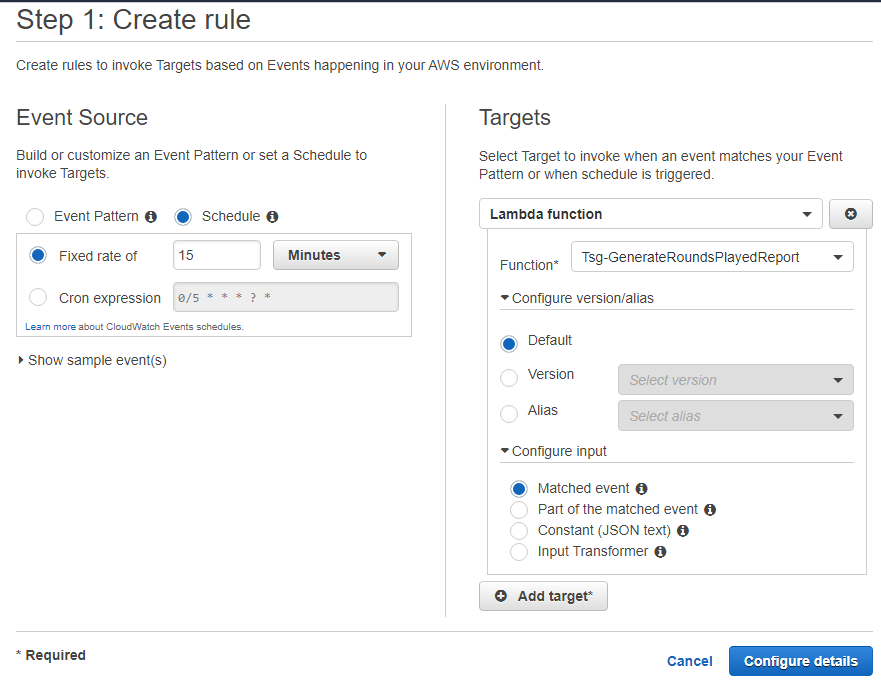
Now click on the big blue button that says ‘Create Rule’. You will be presented with a screen where the first option is either ‘Event Pattern‘ or ‘Schedule‘, click on schedule.
If the lambda needs to run every X minutes/days use the first option ‘Fixed rate of’, type in a number and select a unit.
If you have a more advanced configuration, you can use a CRON expression.
Now click on the grey button on the right hand side called ‘Add Target’. It will default to showing a lambda option. Select your lambda now.
Side Note: The ‘Event Pattern‘ option gives you the ability to invoke a lambda on many different events, one example is raising an event to run a piece of code when somebody pushes an update to a docker image on ECR? You can configure that here.
A brief note on other options
'Configure version/alias' – If you have a specific version of a lambda, set this here. If you’re not sure just leave defaults
'Configure input' – lambda’s can take different inputs. You are running on a schedule; none of these options (possibly ‘Constant’ may) are going to provide much benefit. This would have more impact on if you where reacting to a specific event where unique event data can be provided.
Continuing creating our schedule for our AWS Lambda
I need my lambda to run every 15 minutes so my screen should look like this and your screen should look similar.

Click ‘Configure details’ and enter name for your lambda rule. You can only use letters, numbers, underscore (_), full stop (.) and hyphen (-). Enter a description for the rule here and make it a good one. What is the schedule? Who is it for? What project is it for? etc
If you’re not ready to enable this schedule yet, you un-tick ‘State’. If the lambda is ready and you want to start running it, leave it ticked.
Click ‘Create Rule’ and you’re done!
It will take you back to a list of rules. From there you will see your new rule and you click it to view details modify/change from there.